

NGINX as a Proxy for Websockets
NGINX supports WebSocket by allowing a tunnel to be set up between a client and a backend server. For NGINX to send the Upgrade request from the client to the backend server, the Upgrade and Connection headers must be set explicitly, as in this example:
location /wsapp/ {
    proxy_pass http://wsbackend;
    proxy_http_version 1.1;
    proxy_set_header Upgrade $http_upgrade;
    proxy_set_header Connection "Upgrade";
    proxy_set_header Host $host;
}
Building the Websocket Server
Initialize your Node.js App and install the websocket package using npm:
npm init -y
npm install ws
Websocket Application
Create the server configuration:
./server.js
port = 8080
var Msg = '';
var WebSocketServer = require('ws').Server();
    wss = new WebSocketServer({port});
    wss.on('connection', function(ws) {
        ws.on('message', function(message) {
        console.log('Received from client: %s', message);
        ws.send('Server received from client: ' + message);
    });
 });
console.log("Websocket Server started on port " + port);
And execute the server with:
node server.jsNGINX Configuration
To have NGINX proxy the requests to our websocket app on the server IP 192.168.2.111, I create the following configuration:
/opt/websocket/wsserver/nginx.conf
worker_processes 1;
worker_rlimit_nofile 8192;

events {
  worker_connections  1024;
}

http {
    map $http_upgrade $connection_upgrade {
        default upgrade;
        '' close;
    }

    upstream websocket {
        server 192.168.2.111:8080;
    }

    server {
        listen 8300;
        location / {
            proxy_pass http://websocket;
            proxy_http_version 1.1;
            proxy_set_header Upgrade $http_upgrade;
            proxy_set_header Connection $connection_upgrade;
            proxy_set_header Host $host;
        }
    }
}
The map block sets the Connection header to close when the Upgrade header in the request is set to ”. NGINX listens on port 8300 and proxies requests to the backend WebSocket server on port 8080. The proxy_set_header directives enable NGINX to properly handle the WebSocket protocol.
Docker
I am going to use the NGINX docker image to spawn a container with the configuration above:
docker pull nginx:1.21-alpine
docker run -d --name nginx --network=host -v /opt/websocket/wsserver/nginx.conf:/etc/nginx/nginx.conf:ro nginx:1.21-alpine
WS Client
I can now install a websocket client called wscat. I can use the program to connect to the server:
npm install wscat -g

wscat --connect ws://192.168.2.111:8300
Connected (press CTRL+C to quit)
> Konbanwa!
< Server received from client: Konbanwa!
node server.js
Websocket Server started on Port 8080
Received from client: Konbanwa!
wscat connects to the WebSocket server through the NGINX proxy. When you type a message for wscat to send to the server, you see it echoed on the server and then a message from the server appears on the client!

Introduction to React.JS 2024
Creating Components
Create a file HelloThere.jsx in the sub directory components:
import React from "react";

// functional component
function HelloWorld() {
    return <h3>Hello World!</h3>
}

// arrow function
const ILikeArrows = () => {
    return <p>I am Artemis.</p>
}

// class component
class ClassyComponent extends React.Component {
    render() {
        return (
            <>
                <HelloWorld />
                <ILikeArrows />
            </>
        )
    }
}

export default ClassyComponent
This component can be imported into App.jsx and rendered by:
import ClassyComponent from './components/HelloThere'

function App() {

  return (
    <div className="App">
      <div>
        <ClassyComponent />
      </div>

      ...

    </div>
  )
}

export default App
Working with Props
// working with props
function Paragraph(props) {
    return (
    <p>In ancient { props.origin }, { props.name } is the { props.profession }. She was heavily identified with Selene, the personification of the Moon, and Hecate, another lunar deity, and was thus regarded as one of the most prominent lunar deities in mythology, alongside the aforementioned two. The goddess { props.equivalent } is her Roman equivalent.</p>
    )
}

function SelfIntroduction() {
    return (
    <>
        <Paragraph
            origin = "Greek mythology"
            name = "Artemis"
            profession = "goddess of the hunt"
            equivalent = "Diana" />
    </>
    )
}

export default SelfIntroduction
Content Projection
// content projection
function Card(props) {
    return (
    <div className="card">
        { props.children }
    </div>
    )
}

function Image() {
    const image = { url: "https://upload.wikimedia.org/wikipedia/commons/thumb/b/b7/Diana_of_Versailles.jpg/314px-Diana_of_Versailles.jpg" }

    return (

      <Card>
        <img src={ image.url } />
      </Card>
    );
  }

export default Image
Conditional Rendering
// functional component
function ConditionalImage({ goddess }) {

    const diana = { url: "https://upload.wikimedia.org/wikipedia/commons/thumb/4/40/Jean-Fran%C3%A7ois_de_Troy_-_Diane_suprise_par_Act%C3%A9on%2C_1734.jpg/800px-Jean-Fran%C3%A7ois_de_Troy_-_Diane_suprise_par_Act%C3%A9on%2C_1734.jpg" }

    const artemis = { url: "https://upload.wikimedia.org/wikipedia/commons/thumb/3/3e/Wall_painting_-_Artemis_and_Kallisto_-_Pompeii_%28VII_12_26%29_-_Napoli_MAN_111441.jpg/505px-Wall_painting_-_Artemis_and_Kallisto_-_Pompeii_%28VII_12_26%29_-_Napoli_MAN_111441.jpg" }

    if (goddess == "diana") {
        return <img src={ diana.url } />
    } else {
        return <img src={ artemis.url } />
    }
}

const ConditionalTitle = (props) => {
    return (
        <div className="title">
        {
            (props.goddess == 'diana')
            ? <h3>The Roman Goddess Diana</h3>
            : <h3>The Greek Goddess Artemis</h3>
        }
        </div>
    )
}


const PaintingCollection = () => {
    return (
        <>
            <h2>Paintings</h2>
            <ConditionalTitle goddess='artemis' />
            <ConditionalImage goddess='artemis' />
            <ConditionalTitle goddess='diana' />
            <ConditionalImage goddess='diana' />
        </>
    )
}

export default PaintingCollection
Loops
const ListItem = (props) => {
    return <li>{props.name}</li>
}

function ListOfAliases() {

    const data = [
        {id: 1, goddess: 'Artemis'},
        {id: 2, goddess: 'Diana'}
    ]

    return (
        <>
            <h3>List of Aliases</h3>
            <ul>
                { data.map(({ id, goddess }) =>
                    <ListItem key={id} name={goddess} />
                )}
            </ul>
        </>
    )
}

export default ListOfAliases
Events
function EventCatcher() {

    const clickHandler = (event) => {
        console.log(event)
    }

    return (
        <>
            <button onClick={clickHandler}>Log Click-Event</button>
        </>
    )
}

export default EventCatcher
function ActionButton({ onClick }) {
return <button onClick={onClick}>Log Click-Event</button>
}
function EventCatcher() {
const clickHandler = (event) => {
console.log(event)
}
return <ActionButton onClick={ clickHandler } />
}
export default EventCatcherState and Reducer Hooks
import { useState, useReducer } from 'react'

const initialState = {count: 0}

function reducer(reducedState, action) {
    switch (action.type) {
        case 'increment':
            return { count: reducedState.count + 1 }
        case 'decrement':
            return { count: reducedState.count - 1 }
        default:
            throw new Error()
    }
}


// props are immutable to be able to modify
// state and redraw ui components use a state hook
function Stateful() {
    const [count, setCount] = useState(0)
    const [state, setState] = useState({ count: 0, goddess: 'Artemis'})

    const handleClick = () => {
        setState({
            ...state,
            count: state.count + 1,
        })
    }

    const [reducedState, dispatch] = useReducer(reducer, initialState)

    return (
        <>
            <p>Diana: { count }</p>
            <button onClick={ () => setCount(count +1)}>Like</button>
            <p>{ state.goddess }: { state.count }</p>
            <button onClick={ handleClick }>Like</button>
            <p>God in general: { reducedState.count }</p>
            <button onClick={ () => dispatch({type: 'increment'})}>Like</button>
            <button onClick={ () => dispatch({type: 'decrement'})}>Dislike</button>
        </>
    )
}

export default Stateful
Effects – Lifecycle for Functional Components
No Dependencies
useEffect(() => {
  //Runs on every render
});
import { useState, useEffect } from "react";
function Timer() {
const [count, setCount] = useState(1000);
useEffect(() => {
setTimeout(() => {
setCount((count) => count - 1);
}, 1000);
});
return <h1>Countdown: {count}s</h1>;
}
export default TimerAn empty Array
Update when component did mount:
useEffect(() => {
  //Runs only on the first render
}, []);
Props or State Values
Update when component did update:
useEffect(() => {
  //Runs on the first render
  //And any time any dependency value changes
}, [prop, state]);
import { useState, useEffect } from "react"
function Counter() {
const [count, setCount] = useState(0);
const [calculation, setCalculation] = useState(0);
useEffect(() => {
setCalculation(() => Math.pow(count, 2));
}, [count]); // <- add the count variable here
return (
<>
<button onClick={() => setCount((c) => c + 1)}>Add Awesomeness</button>
<p>Awesomeness: {count}</p>
<p>Awesomeness²: {calculation}</p>
</>
);
}
export default CounterUnmount Legacy
Update when component did unmount:
useEffect(() => {
  //Runs when component get's destroyed
  return () => console.log('Ciao!')
}, [prop, state]);
Context API – Share Reactive Data among Components
// without context
// pass prop down a chain of child components

function PropDrilling() {
    const [count] = useState(44)

    return <Child count={count} />
}

function Child({ count }) {
    return <GrandChild count={count} />
}

function GrandChild({ count }) {
    return <div>{count}</div>
}
// with context
// write prop to context to make it available to all components
const CountContext = createContext(0)
function PropContext() {
const [count] = useState(88)
return (
<CountContext.Provider value={count}>
<ChildContext count={count} />
</CountContext.Provider>
)
}
function ChildContext() {
return <GrandChildContext />
}
function GrandChildContext() {
const count = useContext(CountContext)
return <div>{count}</div>
}Error Boundary
class ErrorBoundary extends React.Component {
    constructor(props) {
        super(props)
        this.state = { hasError: false }
    }

    // catch error
    static getDerivedStateFromError(error) {
        return { hasError: true }
    }

    componentDidCatch(error, errorInfo) {
        console.log(error, errorInfo)
    }

    render() {
        // there was a problem - provide fallback
        if (this.state.hasError) {
            return <p><em>Safe Fallback instead of a Crash</em></p>
        }
        // everything is fine - continue
        return this.props.children
    }
}


function BreakingComponent() {
    return <p>{ anelusiveprop }</p>
}

function CaughtError() {

    return (
        <>
            <ErrorBoundary>
                <BreakingComponent />
            </ErrorBoundary>
        </>
    )
  }

export default CaughtError
Introduction to Websockets
TCP & UDP in Node.js
TCP Server
const net = require("net")

const port = 8080

const server = net.createServer(socket => {
    socket.write("Hello.")
    socket.on("data", data => {
        console.log(data.toString())
    })
})

server.listen(port)
You can run this file in Node.js:
node tcp.jsAnd connect to it using Telnet:
telnet 127.0.0.1 8080
Hello
Everything you type after that will be logged in your server console.
UDP Server
const dgram = require('dgram');
const socket = dgram.createSocket('udp4');

const port = 8081

socket.on('message', (msg, rinfo) => {
    console.log(`server got: ${msg} from ${rinfo.address}:${rinfo.port}`);
});

socket.bind(port);
echo "hi" | nc -w1 -u 192.168.2.112 8081server got: hi
from 192.168.2.110:44757HTTP in Node.js
var http = require('http')
var url = require('url')
var fs = require('fs')
var path = require('path')
var baseDirectory = __dirname   // or whatever base directory you want

var port = 80

http.createServer(function (request, response) {
    try {
        var requestUrl = url.parse(request.url)

        // need to use path.normalize so people can't access directories underneath baseDirectory
        var fsPath = baseDirectory+path.normalize(requestUrl.pathname)
        var fileStream = fs.createReadStream(fsPath)
        fileStream.pipe(response)

        fileStream.on('open', function() {
             response.writeHead(200)
        })

        fileStream.on('error',function(e) {
             response.writeHead(404)     // assume the file doesn't exist
             response.end()
        })
   } catch(e) {
        response.writeHead(500)
        response.end()     // end the response so browsers don't hang
        console.log(e.stack)
   }
}).listen(port)

console.log("listening on port "+port)
<!DOCTYPE html>
<html lang="en">
<head>
<meta charset="UTF-8">
<meta name="viewport" content= "width=device-width, initial-scale=1.0">
<meta http-equiv="X-UA-Compatible" content="IE=edge">
<title>A HTML Page</title>
</head>
<body>
<h1>Just a Test</h1>
</body>
</html>Run node http.js and open the page inside your web browser or run the following from your Terminal:
curl htttp://localhost/index.html
<!DOCTYPE html>
<html lang="en">
    <head>
        <meta charset="UTF-8">
        <meta name="viewport" content= "width=device-width, initial-scale=1.0">
        <meta http-equiv="X-UA-Compatible" content="IE=edge">
        <title>A HTML Page</title>
    </head>
    <body>
        <h1>Just a Test</h1>
    </body>
</html>Websockets in Node.js
Building a Websocket server in Node.js – starting by creating a basic http /tcp server:
const http = require("http")
const port = 8888

const server = http.createServer((req, res) => {
    console.log("Request received")
})

server.listen(port, () => console.log("Websocket Server listening on Port "+port))
Run the server with Node.js and try sending a GET request from your browser on http://localhost:8888/ – the line Request received should appear every time you send an request:
node index.js
Websocket Server listening on Port 8888
Request received
The server now is able to receive HTTP GET request. I now want to upgrade incoming requests to a websocket connection:
const http = require("http")
const WebSocket = require("websocket").server
let connection = null;
const port = 8888

const server = http.createServer((req, res) => {
    console.log("Request received")
})

const websocket = new WebSocket({
    "httpServer": server
})

websocket.on("request", request=> {
    connection = request.accept(null, request.origin);
    connection.on("open", () => console.log("Websocket connection established"))
    connection.on("message", message => {
        console.log(`message: ${message.utf8Data}`)
    })
    connection.on("close", () => console.log("Websocket connection closed"))
})

server.listen(port, () => console.log("Websocket Server listening on Port "+port))
Install the websocket module and re-run the server – sending an HTTP GET request should now initialize the websocket connection:
npm init -y
npm install websocket
node index.js
And I can use my browser console as the client application and send a message to my server:
ws = new WebSocket("ws://localhost:8888")
ws.onmessage = message => console.log(`${message.data}`)
ws.send("Hi")
To send a message from the Server to the Client I can add another to the server script:
const http = require("http");
const WebSocket = require("websocket").server;
let connection = null;
const port = 8888;

const server = http.createServer((req, res) => {
    console.log("Request received")
});

const websocket = new WebSocket({
    "httpServer": server
});

websocket.on("request", request=> {
    connection = request.accept(null, request.origin);
    connection.on("open", () => console.log("Websocket connection established"))
    connection.on("message", message => {
        console.log(`message: ${message.utf8Data}`)
    })
    connection.on("close", () => console.log("Websocket connection closed"))

    heartBeat();
});

server.listen(port, () => console.log("Websocket Server listening on Port "+port));

function heartBeat(){
    connection.send(`I am still here`);
    setTimeout(heartBeat, 30000);
};
Web3.js Blockchain Application
Web3.js is a collection of libraries that allow you to interact with a local or remote Ethereum node using HTTP, IPC, or WebSocket. Web3.js can be used in the frontend or backend of an application to read data from the blockchain.
Blockchain authentication can be used to protect application with public data. It helps identify who is accessing the website and what data should be accessible for the logged-in user. This is the evolution coming from a Basic Authentication system with a username and password in web1 to OAuth system allowing users to use their social media logins to login to another system with web2 and on to web3 – a decentralized system that does not involve a third-party that holds your data for you. Every user has complete control over their personal data using a Decentralised Identity.
As a proof of work we can build an application that:
- Has a login section where the user can connect to their wallet.
- Has a dashboard section to display the logged-in user’s wallet address and their Ethereum account balance.
Web3.js Library
The Web3 library can be installed as a Node module. But to get started it can also be linked in from a CDN:
<script src="https://cdnjs.cloudflare.com/ajax/libs/web3/1.8.1/web3.min.js" integrity="sha512-vtUOC0YIaNm/UutU7yfnwqnF9LOYnXtpHe2kwi1nvJNloeGQuncNBiEKP/3Ww3D62USAhbXGsnYpAYoiDsa+wA==" crossorigin="anonymous" referrerpolicy="no-referrer"></script>Update: There is now a new alpha version 4 available.
<script src="https://cdnjs.cloudflare.com/ajax/libs/web3/4.0.1-alpha.1/web3.min.js" integrity="sha512-53NYeuuMZACjFqIMYEeKpIAURC/HYaAKFQ3InNgTmS45BX7qNOMmjgmE5Fvidj0+hHHC9ICYi5L4AAIhqG2fOQ==" crossorigin="anonymous" referrerpolicy="no-referrer"></script>index.html
<!DOCTYPE html>
<html lang="en">
  <head>
    <meta charset="UTF-8" />
    <meta http-equiv="X-UA-Compatible" content="IE=edge" />
    <meta name="viewport" content="width=device-width, initial-scale=1.0" />
    <script src="https://cdnjs.cloudflare.com/ajax/libs/web3/4.0.1-alpha.1/web3.min.js"
            integrity="sha512-53NYeuuMZACjFqIMYEeKpIAURC/HYaAKFQ3InNgTmS45BX7qNOMmjgmE5Fvidj0+hHHC9ICYi5L4AAIhqG2fOQ=="
            crossorigin="anonymous"
            referrerpolicy="no-referrer"></script>
    <link rel="stylesheet" href="styles.css" />
    <title>Web3.js Login Test</title>
  </head>
  <body></body>
  <script src="./scripts.js"></script>
</html>
Ethereum Wallet
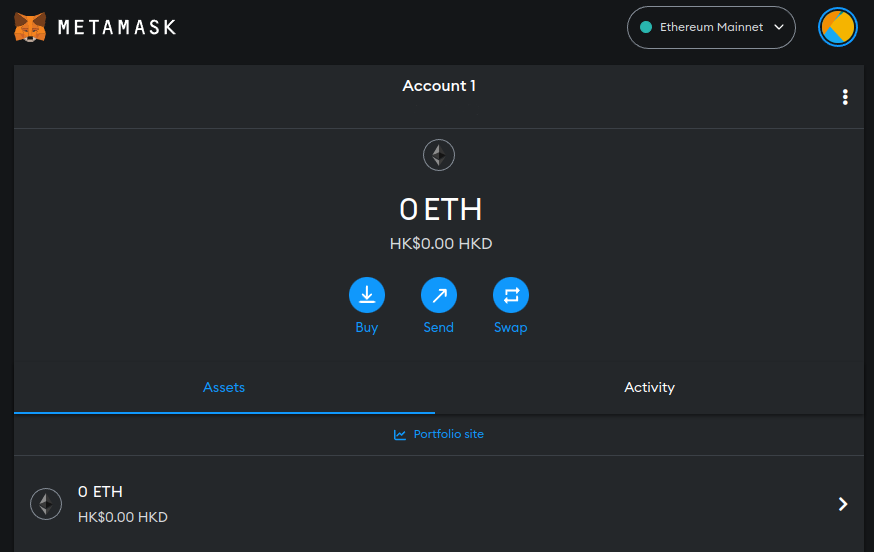
To be able to authenticate using the Ethereum Blockchain we need to setup a Ethereum Wallet on our device first. We can use Metamask to interact with our Ethereum account via a web browser – e.g. as a Chrome Plugin:
Create your account and generate your Secret Key and keep it somewhere save:
Building the Application
Now that we have Web3.js and an Ethereum wallet installed we can start building the interface. Add the following blocks inside the Body tag.
The Login Screen
index.html
<section class="login-section">
    <button class="login-btn">🔓 Log in with Web3</button>
    <span class="instruction">
        Ensure to have an Ethereum based wallet installed i.e MetaMask
    </span>
</section>
The Dashboard
index.html
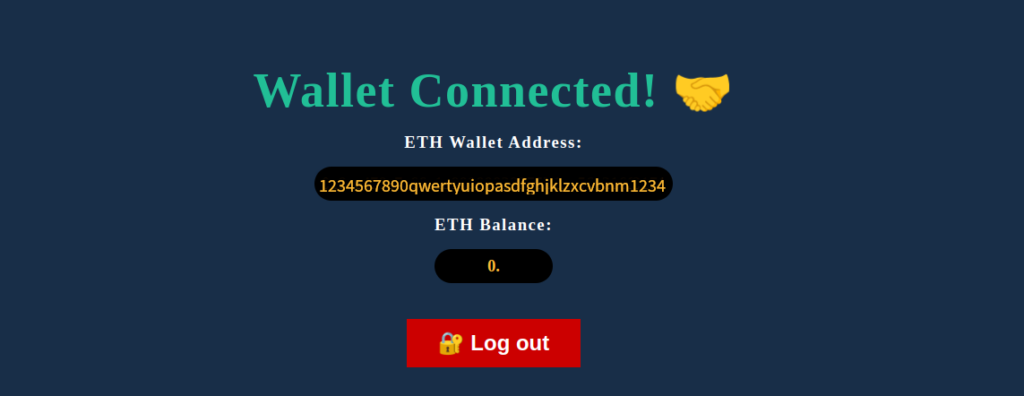
<!-- DASHBOARD SECTION -->
<section class="dashboard-section">
    <h2 class="wallet-status">Wallet Connected! 🤝</h2>
    <h3 class="wallet-address-heading">
        ETH Wallet Address:
        <span class="wallet-address"></span>
    </h3>
    <h3 class="wallet-balance-heading">
        ETH Balance:
        <span class="wallet-balance"></span>
    </h3>
    <button class="logout-btn">🔐 Log out</button>
</section>
Scripting
Do you even have an Ethereum Wallet?
On page load, check if the user has an Ethereum wallet installed. Else prompt the user with a message to install a wallet. If the user is already logged in simply load the dashboard:
scripts.js
// Global wallet address variable
window.userWalletAddress = null;

// Check if metamask is available and if user is logged in already
window.onload = async (event) => {

  // Check if ethereum extension is installed
  if (window.ethereum) {
    // Create instance
    window.web3 = new Web3(window.ethereum);
  } else {
    // Prompt to install
    alert("Please install MetaMask or any Ethereum Extension Wallet");
  }
  // Check if already logged in and update the global userWalletAddress variable
  window.userWalletAddress = window.localStorage.getItem("userWalletAddress");
  // Show dashboard
  showUserDashboard();
};
Login Button
When the Metamask extension is installed but the user is not yet logged in we need a login function. Bind the login button to this function:
scripts.js
// Web3 login function
const loginWithEth = async () => {
    // Check if there is global instance
    if (window.web3) {
      try {
        // Get the user's account
        const selectedAccount = await window.ethereum
          .request({
            // Prompt metamask to login
            method: "eth_requestAccounts",
          })
          .then((accounts) => accounts[0])
          .catch(() => {
            // Catch cancelled login
            throw Error("Please select an account");
          });

        // Set global wallet address variable
        window.userWalletAddress = selectedAccount;

        // Store in local storage => can be moved to db later
        window.localStorage.setItem("userWalletAddress", selectedAccount);

        // Show dashboard
        showUserDashboard();

      } catch (error) {
        alert(error);
      }
    } else {
      alert("Wallet not found");
    }
  };

  // Bind function to login button
  document.querySelector(".login-btn").addEventListener("click", loginWithEth);
Load Dashboard after Login
Check if a user is connected to their wallet address. If they are not connected, display the login section. Once connected redirect the user to the dashboard section:
// Show the user dashboard
const showUserDashboard = async () => {

    // If not logged in
    if (!window.userWalletAddress) {

      // Change the page title
      document.title = "Web3 Login";

      // Show the login
      document.querySelector(".login-section").style.display = "flex";

      // Hide dashboard
      document.querySelector(".dashboard-section").style.display = "none";
      return false;
    }

    // change the page title
    document.title = "Metamask Dashboard";

    // Hide the login
    document.querySelector(".login-section").style.display = "none";

    // Show dashboard
    document.querySelector(".dashboard-section").style.display = "flex";
};
Displaying Ethereum Stats
// Show wallet address from stored variable
const showUserWalletAddress = () => {
  const walletAddressEl = document.querySelector(".wallet-address")
  walletAddressEl.innerHTML = window.userWalletAddress
}

// Get wallet balance
const getWalletBalance = async () => {
    if (!window.userWalletAddress) {
      return false
    }
    const balance = await window.web3.eth.getBalance(window.userWalletAddress)
    // Convert the balance to ether
    document.querySelector(".wallet-balance").innerHTML = web3.utils.fromWei(
      balance,
      "ether"
    )
}
Web3 Logout
To logout we need to set the global userWalletAddress variable to null and remove the userWalletAddress from the browser localStorage:
// Web3 logout
const logout = () => {
  // Set the global userWalletAddress to null
  window.userWalletAddress = null

  // Remove wallet address from local storage
  window.localStorage.removeItem("userWalletAddress")

  // Show the user dashboard
  showUserDashboard()
}

// Bind function to logout button
document.querySelector(".logout-btn").addEventListener("click", logout)